Before going towards why wood stain needs to be sealed, firstly see what wood staining is.
Staining
Staining is recommended and essential as well whenever you wish to change the overall natural look of wood. It’s the best choice when you want to put wood in a uniform color.
You can moist the surface of the wood with denatured alcohol for a finished look.
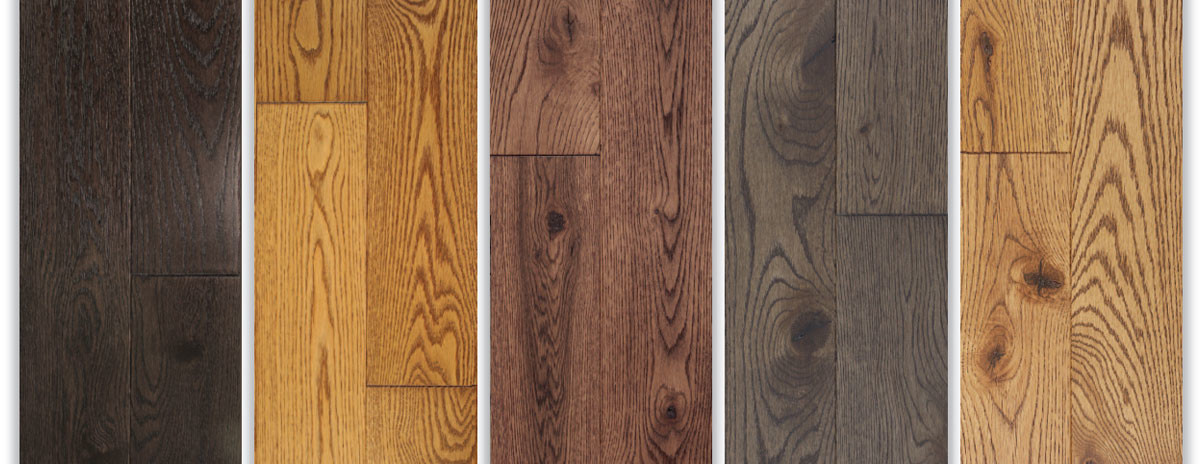
One of the difficulties you may face is to choose the right stain. There are different types of stains available; primary four are premixed oil-based stains, premixed water-based stains, premixed sealer stains, & mix your customized stains or dyes. Among these, the premixed stains are most commonly available and easier to use and readily available.
Now when we know how to stain and what is needed for it. So, let’s start discussing Sealing.
Sealing
A sealer is mostly used over the stain or on unstained wood. It seals the pores of the wood to give a smooth finish. Not only this, but it also prevents the stain from mixing into successive coats of finish materials. The best way is to apply it with a brush, one having long grains. It works rapidly and dries fast.
Why do you need to seal the stained wood?
There are majorly two reasons for it:
- An unfinished stain will lack the overall look of the wood as it meant to be. If you need a clear coat at the top, it won’t look like it.
- Another issue is that it lacks the protection and longevity of the wood. Moisture and humidity would affect negatively to it.
To make the best suitable decision, you must know what will happen if you seal the stain or not. Here are some pros and cons of leaving your stain coat or doing it. Have a look!
Pros & Cons of not stealing your Stain
Pros:
Firstly, finishing will look although smooth. The best part is, it will be done at a faster pace, and the overall look will be enhanced.
Cons:
The negative side is that the wood wouldn’t be very well protected. You won’t be able to see the best possible finishing look.
Pros & Cons of sealing your Stain
Pros:
The positives include an additional layer of protection on the piece. It will retain its shape against humidity and moisture changes in the environment.
Cons:
On the negative side, you may have to bear the extra expense of lacquer or another sealer product and then additional time to apply it.
How to choose Seal?
There are some traditional sealers made up of shellac, lacquer, and natural varnish. It is made up of a simple mixture having one part white shellac and three parts of denatured alcohol. Shellac is essential in the mix because it supports the wood refinishing. Without this element, it would be impossible to give a smooth look. Remember, don’t mix shellac with polyurethane varnish or with water or (non-grain-raising) stains. You won’t be able to get benefits from it then.
When shellac isn’t available, you may use commercial sanding sealer. It dries very quickly and provides a strong base. You may use it with any varnish or lacquer. Remember one more thing; it’s not compatible with polyurethane.
The thin mixture is suitable for an excellent finish. You should add turpentine or mineral spirits to make a 50-50 mixture. It will give an impeccable finish and polish to your wood. Just read the labels on the bottle carefully before using it. If you need help with choosing the right wood stain and sealer, I suggest you take the professional help.
Tips & Tricks for Sealing
Here are some of the tips and tricks to get you through the wood sealing process successfully. Have a look!
- Always apply the sealer with a clean brush.
- Do the process evenly and at a fast pace to make sure all surfaces are evenly covered.
- Give at least 2 hours to dry the seal.
- If you apply a finishing coat directly over sanded wood, more than one coat of sealer is needed.
- Keep in mind, very porous woods may require several coats of sealer. It doesn’t get done with one coat.
- Apply thin coats of finish. It creates fewer problems, and it’s easier to see imperfections in it.
- Always choose a good brand that has a good track record and credibility.
- If you are doing it for the first time, do some practice on some scraps first.
Final Words
So, now you know almost everything about staining your wooden furniture. You may enhance its overall appearance and hide all the possible minor imperfections. It may take some of your time and effort to prepare a piece of wood for staining, but trust me, it would worth it.